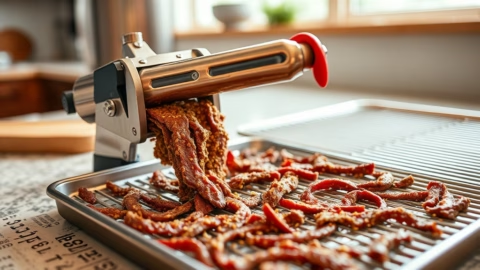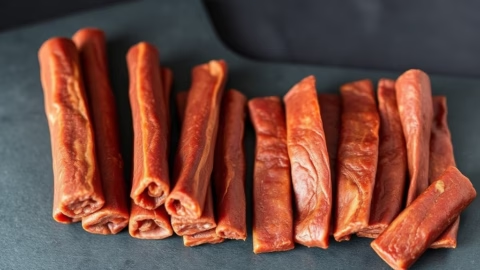

Learning how to make beef jerky at home is one of the most satisfying things you can do with a few pounds of lean beef and a little patience. I have been making small-batch jerky for years, and I can tell you the process is simpler than most people think. You do not need fancy gear or secret ingredients, just a good cut, a sharp knife, a solid marinade, and a dehydrator that holds steady heat. Done right, homemade jerky beats anything off the gas-station rack: more flavor, no mystery fillers, and a fraction of the cost. Let me walk you through exactly how I do it.
What You Need Before You Start
Good jerky starts with the right tools and ingredients. Keep it simple your first time around, and you will get repeatable results you can build on later.
- A lean cut of beef (about 2 pounds to start). See our guide to the best cuts of beef for jerky if you are unsure what to grab.
- A food dehydrator with an adjustable thermostat. If you are shopping, our best jerky dehydrator roundup covers what to look for, and the Cosori dehydrator is the one I reach for most.
- A sharp slicing knife (and a cutting board you trust).
- Marinade ingredients: soy sauce, Worcestershire, brown sugar, garlic, pepper, and a little curing salt if you want longer shelf life.
That is the whole kit. Once you have it on the counter, the rest is just steps.
Step 1: Pick a Lean Cut
Fat is the enemy of shelf-stable jerky. It does not dry out the way muscle does, and it turns rancid faster, so the leaner your cut, the longer your jerky keeps. Eye of round, top round, and bottom round are my go-to picks because they are lean, affordable, and slice cleanly. Flank steak works too if you want a bolder beefy chew. Ask the butcher for a single solid piece rather than pre-portioned steaks, since a whole roast gives you more control when you slice. Skip anything heavily marbled like ribeye, no matter how good it looks raw.
Step 2: Trim the Fat
Before slicing, trim off every bit of visible fat and silver skin you can reach. I lay the chilled roast on the board and work the knife just under the fat cap, pulling it away in long strips. Take your time here. Any fat you leave behind is fat that can spoil, soften the texture, and shorten how long your batch lasts. A clean, trimmed piece of lean muscle is what you are after. When it looks like a uniform block of deep-red meat with no white streaks, you are ready to slice.
Step 3: Slice Thin, With or Against the Grain
Slice the beef into strips about 1/8 to 1/4 inch thick. The single best trick for clean, even slices is to pop the trimmed meat in the freezer for 30 to 60 minutes first. Firm, partly frozen beef cuts like a dream.
With the grain vs. against the grain
Slicing with the grain gives you that classic chewy, jerky-shop bite. Slicing against the grain makes a more tender strip that snaps apart. Neither is wrong. For your first batch, try with the grain for traditional texture, then experiment from there.
Step 4: Marinate for Flavor
The marinade is where your jerky gets its personality. A reliable starting point: 1/2 cup soy sauce, 1/4 cup Worcestershire, 2 tablespoons brown sugar, 1 teaspoon black pepper, 1 teaspoon garlic powder, and 1 teaspoon onion powder for 2 pounds of beef. Whisk it together, add the strips, and make sure every piece is coated.
How long to marinate
Refrigerate the meat in the marinade for at least 6 hours, ideally overnight. Longer means deeper flavor and saltier results, so taste-test your timing across a few batches. Always marinate in the fridge, never on the counter. For recipe ideas, see our jerky marinade recipes.
Step 5: Arrange on the Trays
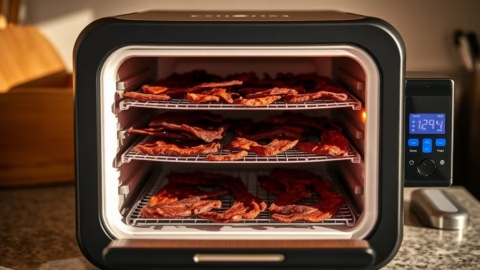
Pull the strips from the marinade and pat them dry with paper towels. A quick blot removes surface liquid so the meat dries faster and more evenly. Lay each strip flat on the dehydrator trays, leaving a little space between pieces so air can move freely around them. Do not let strips overlap or touch, or they will dry unevenly and the spots that stay damp become a food-safety problem. Patience on the layout step pays off with a consistent batch.
Step 6: Dehydrate at About 160F
Set your dehydrator to around 160F and let it run. Most batches take 4 to 8 hours depending on strip thickness, marinade moisture, and your machine. Start checking at the 4-hour mark and rotate trays if your unit dries unevenly. Resist the urge to crank the heat to rush it; too hot and the outside hardens while the inside stays moist, which is exactly what you do not want. Steady, moderate heat over several hours is what turns marinated beef into proper jerky.
Step 7: Check Doneness, Then Store
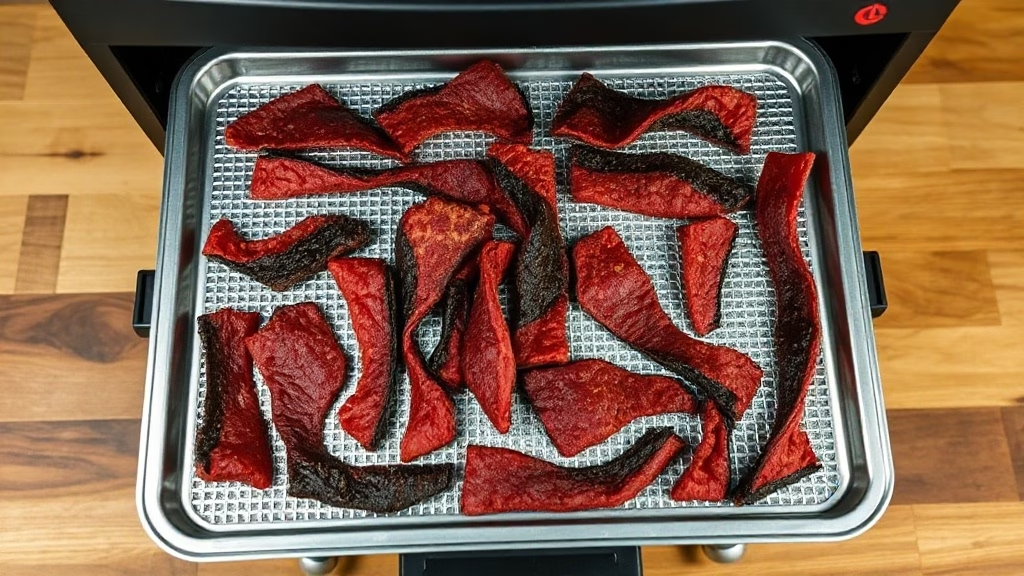
Properly dried jerky bends and cracks but does not snap clean in half. When you fold a cool strip, it should crack along the bend without breaking apart. If it is still bendy and moist, give it more time.
The bend-and-crack test
Always test a piece that has cooled to room temperature, since warm jerky feels softer than it really is. Once a batch passes, let the whole lot cool completely before you pack it away. For details, see how long jerky lasts.
A Word on Food Safety
This is the part too many home guides skip. Drying alone does not guarantee harmful bacteria are killed. For safe homemade jerky, the meat needs to reach an internal temperature of 160F (165F for poultry). The safest method is to heat the strips in a 160F oven for 10 minutes before dehydrating, or to confirm your finished jerky hit that temperature. For the full official guidance, read the USDA’s jerky and food safety page. Do not skip this step, especially if you are sharing your jerky.
Marinade Basics to Riff On
Once you nail the classic recipe, the marinade becomes your playground. Salt (soy or plain) is non-negotiable for flavor and preservation. Sweetness from brown sugar or honey balances the salt. Acid like Worcestershire or a splash of vinegar tenderizes and brightens. From there, build heat with crushed red pepper, smoke with a little liquid smoke, or warmth with smoked paprika. Change one variable per batch so you actually learn what each addition does. Keep notes; your future self will thank you when you land on a blend worth repeating.
How to Store Homemade Jerky
Cooled, properly dried jerky keeps about 1 to 2 weeks in an airtight container or zip bag at room temperature. For longer storage, refrigerate it for up to a month or freeze it for several months. If you used curing salt, shelf life stretches a bit further. Toss a food-safe desiccant packet in the bag to fight moisture, and check for any off smell or sliminess before eating older batches. When in doubt, throw it out.
Frequently Asked Questions
Can I make beef jerky without a dehydrator?
Yes. A low oven set to its lowest temperature (ideally near 160F) with the door cracked works, though it is less efficient and harder to keep even than a dedicated machine.
How long does homemade beef jerky last?
About 1 to 2 weeks at room temperature in an airtight container, up to a month refrigerated, and several months frozen. Curing salt extends that further.
Why is my jerky too tough or too brittle?
Over-drying or slicing too thin makes brittle jerky; under-trimmed fat or too-thick slices make it chewy or greasy. Adjust thickness and dry time next batch.
Do I really need to reach 160F?
Yes. Hitting 160F internal (165F for poultry) is what makes homemade jerky genuinely safe, not just dry. Treat it as a hard rule.
Final Thoughts
That is the whole playbook for how to make beef jerky at home: a lean cut, careful trimming, thin even slices, a marinade you love, steady drying around 160F, and a real commitment to food safety. Your first batch might not be perfect, but it will be yours, and it will be better than store-bought. Keep notes, tweak one thing at a time, and before long you will have a house blend people beg you for. If you want a benchmark for flavor and texture while you dial yours in, browse our picks for the best beef jerky. Now go fire up that dehydrator.